發表文章

目前顯示的是有「Python」標籤的文章

[LeetCode]Two Sum

Two Sum  給一串整數陣列為 nums 和一個整數 target ,需要回傳兩個加總起來等於 target 的兩個索引值。 輸入的陣列一定只會有一個解,且索引值不能重複使用。 Example 1 Input: nums = [2,7,11,15], target = 9 Output: [0,1] Explanation: Because nums[0] + nums[1] == 9, we return [0, 1]. Example 2 Input: nums = [3,2,4], target = 6 Output: [1,2] Example 3 Input: nums = [3,3], target = 6 Output: [0,1] 解法 暴力解法 利用兩層for迴圈進行計算,以 [2, 7, 11, 15] 為例,(2, 7)、(2, 11)、(2, 15)、(7, 11)...以此類推,當加總等於目標值即回傳結果。 function twoSum($nums, $target) { for ($i = 0; $i < count($nums); $i++) { for ($j = $i + 1; $j < count($nums); $j++) { if ($nums[$i] + $nums[$j] == $target) return [$i, $j]; } } } 雜湊解法 將目標值與當前數值相減後比對雜湊表,並把當前的 value-key 存放到雜湊表, 重複此操作直到找到結果。 nums = (11, 7, 2, 15) target = 9 current_key: 0, current_num: 11, remaining: -2 map: {11:0}, return: null current_key: 1, current_num: 7, remaining: 2 map: {11:0, 7:1}, return: null current_key: 2, current_num: 2, remaining: 7 map: {11:0, 7:1}, return: [2, 1] PHP f...
[實作教學]使用Line Notify收到Dcard最新文章通知

圖片
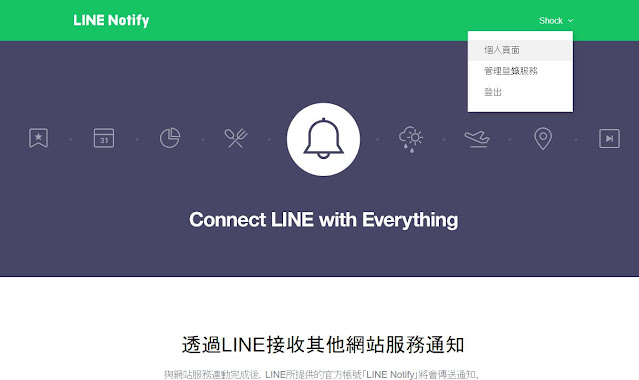
透過官方帳號進行推播會因為人數越來越多而增加發送成本,因此 Line Notify是一個官方提供帳號來傳送通知,重要的是免費!! 首先登入到  LINE Notify  並進入到個人頁面 選擇要接收通知的聊天室 把產生的權證記錄下來,如果遺失或忘記的話就只能重新連接獲取新的權證 這樣到這邊 Line Notify 的設定就完成了,接著看程式碼 https://github.com/hardy1234554321/shockuccu-linenotify 。 使用到的 python 模組 requests:建立與 Dcard 之間連線,獲取我們要的網頁資料 bs4:BeautifulSoup是一個用來解析HTML結構的Python套件 re:利用正則表達式分析url time:用 time.sleep() 進行睡眠,降低發送 request 頻率 datetime:取得當前時間 sqlite3:簡單紀錄文章資訊 設定 Line Notify Request method/Parameter,可參考這篇 [新手教學]如何使用Line Notify 設定 Line Notify 參數設定 token:傳送權證 message:傳送要發送的訊息 img:傳送要發送的圖片url isNotificationDisabled :是否要收到通知 def lineNotifyMessage(token, message, img, isNotificationDisabled = False): headers = { "Authorization": "Bearer " + token, "Content-Type": "application/x-www-form-urlencoded" } payload = { 'message': message, 'imageThumbnail': img, 'imageFullsize': img, 'notificationDisabled': isNotificatio...

Python安裝設定

圖片
Python的官方網站 下載最新版本,或是找到適合自己的版本 開啟安裝檔,可以先勾選 Add Python 3.7 to PATH,這樣安裝就會設定 Windows 的環境變數。 安裝完畢後,開啟命令提次元,輸入 python,出現版本資訊表示安裝成功。 測試看看,print('Hello') 使用 VS Code 編輯 Python 安裝 Python 延伸模組 新增一個檔案,選擇 Python 為存檔類型 不免俗的先印出個 Hello World!

Django資料庫連線

資料庫設定 開啟Hangman/settings.py。Django預設為SQLite,但也支援PostgreSQL、MySQL、Orcale。 其他設定參考Django Database。 *使用MySQL遇到的問題,Django2.1.*需要MySQL5.6或以上的版本。 否則需在settings.py上方加入 from django.db.backends.mysql.base import DatabaseWrapper DatabaseWrapper.data_types['DateTimeField'] = 'datetime' 建立models 開啟game/models.py from django.db import models class Vocabulary(models.Model): word_text = models.CharField(max_length=20) pub_date = models.DateField('date published') 編輯settings.py ,加入game app INSTALLED_APPS = [ 'django.contrib.admin', 'django.contrib.auth', 'django.contrib.contenttypes', 'django.contrib.sessions', 'django.contrib.messages', 'django.contrib.staticfiles', 'game.apps.GameConfig', ] 同步資料庫 產生要調整資料庫的記錄 python  manage.py  makemigrations game 顯示要執行的SQL python  manage.py  sqlmigrate game 0001 欄位寫入資料庫 根據剛剛產生的記錄,將models.py的欄位寫入資料庫 python  manage.py  migrate 建立admin帳號 python  manage.py ...

Django建立第一個專案

環境python3版本 pip install Django 檢查是否成功安裝 python -m django --version 建立專案(project) 先cd到要建立專案的資料夾底下 django-admin startproject Hangman 檔案結構 Hangman/ manage.py Hangman/ __init__.py settings.py urls.py wsgi.py Hangman/代表專案的根目錄,該名稱可任意變更,manage.py為Django的命令列工具. 開起server python manage.py runserver [port] 建立應用程式(app) python manage.py startapp game 在game目錄底下建立 urls.py 建立第一個介面 開啟game/views.py from django.http import HttpResponse def index(request): return HttpResponse("Hello World. You're at the game index") 開啟game/urls.py from django.urls import path from . import views urlpatterns = [ path('', views.index, name='index'), ] 開啟Hangman/urls.py from django.contrib import admin from django.urls import include, path urlpatterns = [ path('admin/', admin.site.urls), path('game/', include('game.urls')), ] 再執行 python manage.py runserver 到瀏覽器輸入http://127.0.0.1:8000/game/